Mesh Setup
Exterior Mesh Setup
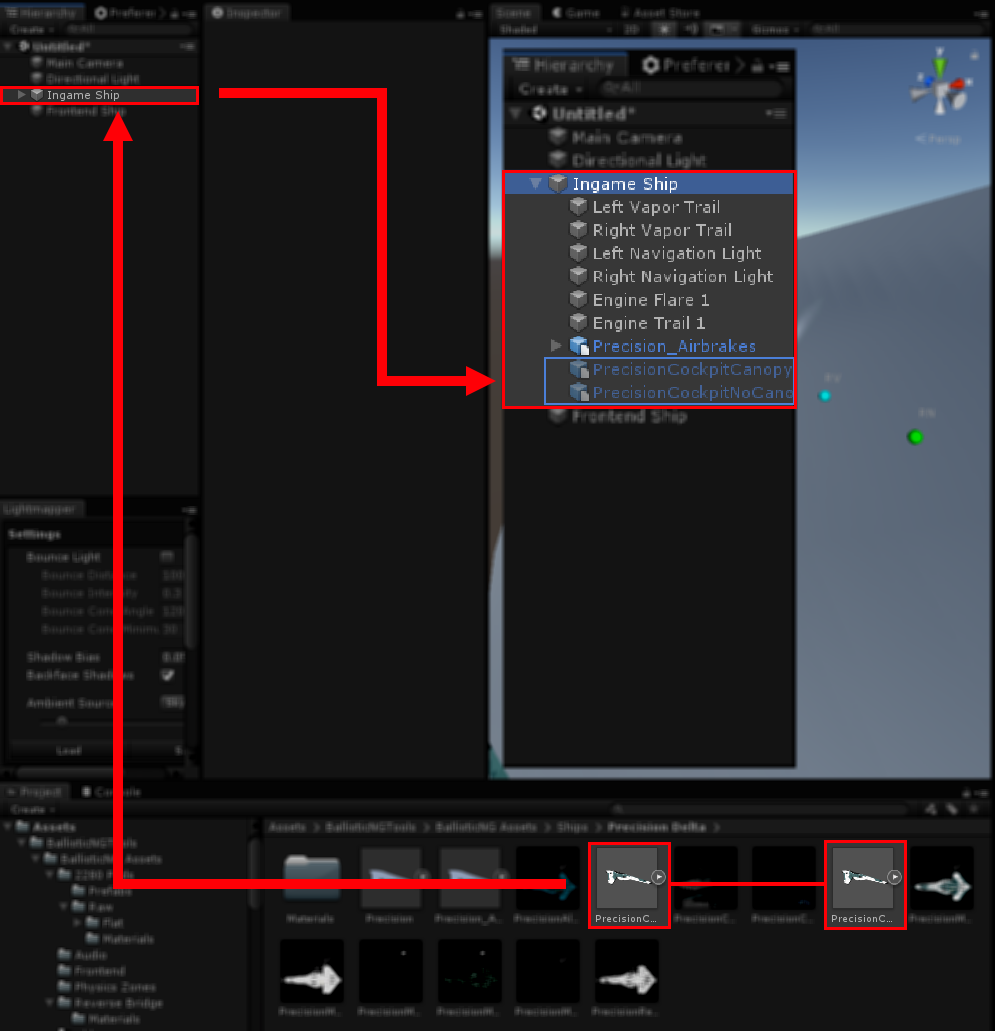
Once your ship is inside of Unity it’s easy to get it setup in your prefab. In the project view navigate to the folder where your ship mesh is located and drag the mesh onto the Ingame Ship game object. This will spawn a copy of the ship as a child to the ship prefab. Once the ship is in you might want to adjust its position and scale, especially if you’re using a scale helper.
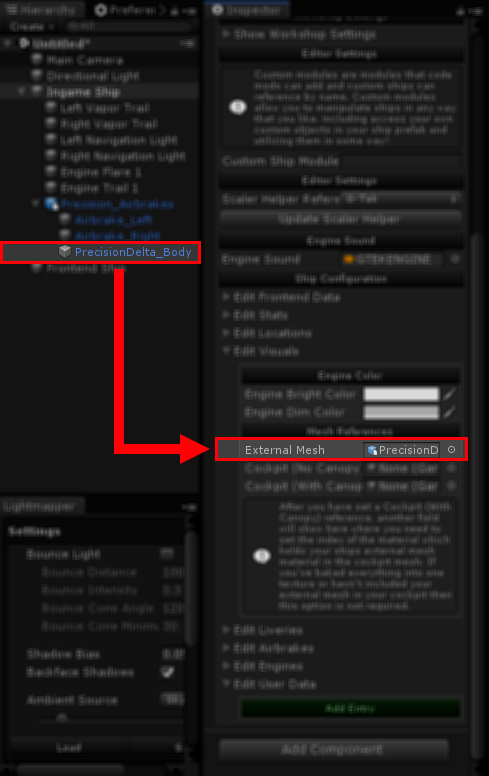
Once your mesh has been added, navigate to the ship inspector and open the Edit Visuals foldout. You will see a field called External Mesh. Drag your ships external mesh object from the hiearchy view into this field. This is important so the game knows which mesh is your ships exterior, you won’t be able to export your ship without first setting this up.
When setting up your ships transform do not move any parent objects as this will interfere with the ships shadow generation. To use the image above as an example, it is okay to scale Precision_Airbrakes but if you want to move the ship you would want to select Airbrake_Left, Airbrake_Right and PrecisionDelta_Body and move those instead. Another solution would be to use Precision_Airbrakes to setup the position and scale but then drop all of the meshes that are a child of it out so they’re children of Ingame_Ship instead. When doing this Unity re-calculates the transforms so your position and scale will be retained relative to the new parent, take a look at the Precision Delta example scene for this approach in practice.
Cockpit Mesh Setup
Note
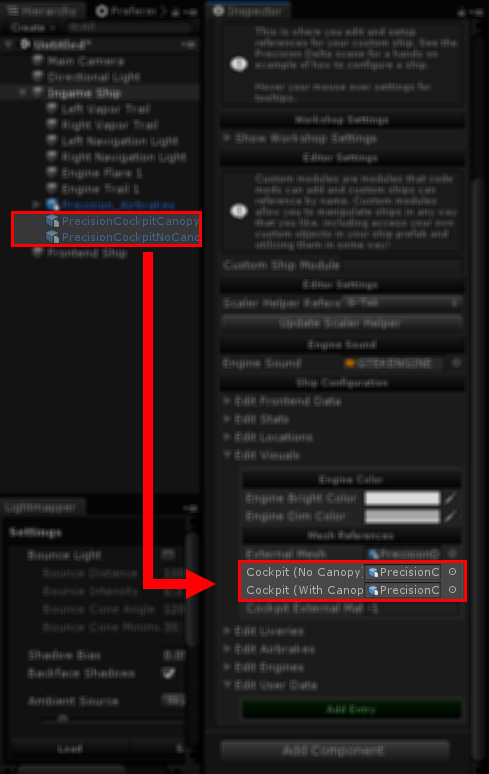
Once your cockpit meshes are setup disable their gameobjects so they arn’t enabled when they’re spawned into the game. With any number of objects selected, click the tick box to to the left of the object name field in the inspector to toggle it’s enabled state.
Setting up your cockpit meshes is identical to setting up the exterior mesh. Before setting up your cockpit meshes it’s reccomended you get the scale you want for the ship figured out first, you don’t need to include cockpits in your exported ship so you can skip this stage for now and come back if you want.
Select both your canopy and non canopy meshes and drag them onto the Ingame Ship object to make them a child of it. Now select both objects in the heiarchy view and position/scale them so the cockpit matches up with the cockpit on your external mesh. If you want to ensure VR players can get the best experience out of your ship it is strongly reccomended that you match up the scale and position as closely as possiblle.
Now like with the external mesh, open up the ship inspector and expand the Edit Visuals foldout. You’ll see two fields in here, one for the cockpit with the canopy and one for it without. Drag the appropiate meshes into these fields. If you only have 1 cockpit mesh, drag it into both fields.
Material ID setup
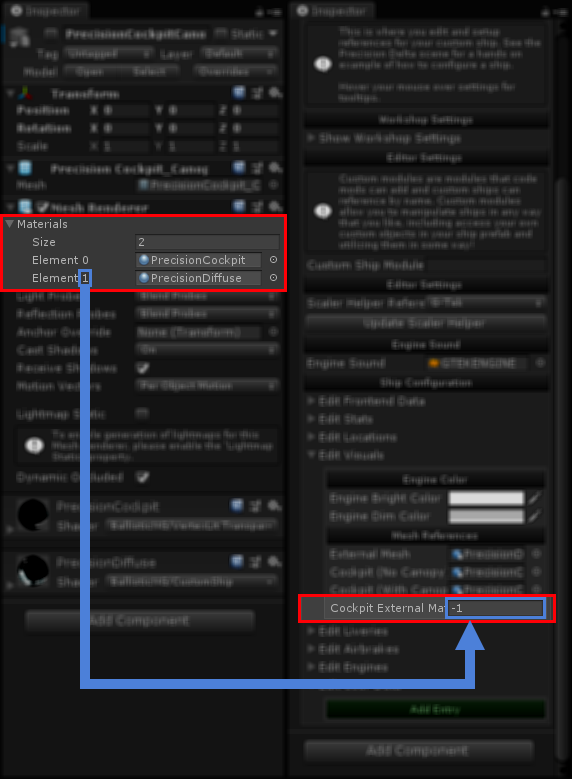
If your cockpit has the exterior ship mesh included you’ll first off want to make sure that the exterior mesh is using the exterior meshes material, this is important for updating liveries for when you’re inside the cockpit view. To do this first select one of your cockpits and look at the materials list in the Mesh Renderer component, you might need to expand the materials foldout. See which material is your exterior meshes material, if the material assigned for the exterior mesh is not correct then update it so it’s the right one. Next to the material you will see Element # where # is a number. Make a note of this number as you’ll need it for the next step.
Head back over to the ship inspector and expand the Edit Visuals foldout again. Under the two canopy fields you will see a field called Cockpit External Material Index. By default it’s -1 which means the game will not attempt a livery update on anything. Update this value to the number you made a note of.
Custom Collision Mesh Setup
As of BallisticNG 1.3.3 you can now assign custom collision meshes for your ship using the Custom Collision Mesh setting under the Edit Visuals / Meshes header.
The collision mesh should share the same space and pivot point as the visual ship mesh. This option overrides the mesh generated for the collision and doesn’t have it’s own separate transform, meaning the transform of the object assigned to External Mesh is used for the mesh.
The mesh is turned into a convex hull. This allows you to provide a separate mesh to adjust the collision but it will still only be a rough estimate of the actual shape.
For modeling purposes you may want to generate the convex hull in your modeling software as it will reflect what the generated convex hull will look like. If you’re using Blender, you can do this by entering edit mode for a mesh and using the Mesh -> Convex Hull operator from the viewport toolbar.
Use the debug_drawshipconvex true command to draw the collision mesh in-game. You can turn it off again using debug_drawshipconvex false